Shooting in dark rooms very difficult, especially for a novice photographer. Here are some tips to help you get nice pictures when shooting in dark places. Of course, locations and types of shooting differ greatly from each other. A lot depends on what you're shooting. For different types of shooting and the required photo quality, you will need different equipment.

Dmitriy Bashaev >
If you shoot custom weddings or christenings, your photos should have certain quality and there should be no noise in them. If you are filming a friendly party or concert in order to show the pictures online, you do not need to have a full-format camera and a fast lens. Compacts with fast focus are quite suitable for photographing friends, parties and other everyday events. SLR camera you will need it to photograph christenings, weddings, corporate events, etc. For professional-level events (reporting, political meetings, etc.) you already need special professional equipment. Expensive professional equipment makes it easier to shoot in difficult conditions, such as shooting in dark places, but whether it is needed to solve your problems is up to you to decide.
Let's talk about the basic principles of shooting in dark rooms.
1. Camera stability.
You will have to shoot at slow shutter speeds and any movement of the camera can affect the quality of the image. If you're shooting more or less static scenes and don't need to constantly move, use a tripod or monopod (if allowed). In the theater, for example, you can try stabilizing the camera on the back of the seat. Do not hold the camera at arm's length when taking pictures.
Some lenses have a stabilizer, but it will not compensate strong motion. Try resting your elbow on your stomach, relax, hold your breath, and gently press the shutter button.

Arman Zhenikeev
2. Equipment.
As we wrote above, it all depends on your goals and objectives. It is optimal to have a full-format DSLR with a fast lens (2.8 or higher). A professional reportage level camera has fast focus and shoots in full frame. The noise in such a camera is 2-3 stops lower (that is, the noise on it at ISO 6400 is the same as at ISO 800). What does it mean? This means you can shoot at faster shutter speeds.
A fast lens gives a clearer image and makes it possible to use an aperture number of 2.8 (on expensive zoom lenses). Whale zooms have a minimum aperture number of 3.5-5.6. Those. the short end loses 2/3 of a stop, the long end loses 2. What does this mean? You can shoot with a shallower depth of field and reduce the sensitivity by one or two stops, for example, use ISO 400 instead of ISO 1600.
Professional equipment allows you to solve problems that are quite difficult to solve with conventional equipment. But professional equipment is expensive and it’s worth considering whether you need it to solve your problems.
3. Flash
If you try to shoot on automatic in dark rooms, the flash will turn on. In most cases, you will simply destroy the existing lighting. If you are filming in a theater, the distance from your seat to the stage will not be captured by the flash and it will not be effective and will disturb other audience members. If you take a photo of a friend in a dark bar with flash, you will end up with a face in front of an almost black background that the flash can't reach. Everything else can be bleached. Expensive flashes will allow you to shoot “off-the-cuff”, even with slow synchronization they will help you freeze movement or simply highlight the subject from the background.
The flash should not be the main subject when shooting. It only helps fill the shadows, separate the object from the background, and highlight it a little. Never use flash head-on. Sometimes the flash can be directed into the stream, but first look at what color the ceiling and walls are. If they are not white, you will be exhausted to correct color reflections in the editor.
Use slow rear curtain sync” , like the flash operating mode (in Canon rear curtain, in Nikon slow-sync rear).

"the sanctuary" captured by Federico
4. Exposition
As a rule, you will have to shoot at fairly high ISO - from 800 to 1600; in new semi-professional cameras you can raise ISO to 3200 or more. Try to shoot at fast shutter speeds (depending on the subject), and wide open apertures (from 2.8 to 4.0). If you shoot primarily on automatic, you'll get better results by shooting in "night mode" (or similar modes).
5. Exposure.
For different types shooting requires different shutter speeds. If you're shooting sporting events in a fairly well-lit environment and you want to freeze motion, you'll want shutter speeds of 1/120 or faster. In concert halls, the rooms are darker, but you will still need shutter speeds of at least 1/60 to 1/100 to freeze motion.
In a theater where there is movement, you may be able to shoot at a shutter speed of less than 1/60. In a museum, objects don't move, and you can use shutter speeds as low as 1/60, as long as you choose a lower ISO and close your aperture a little.
Change the settings, try it. Move the values up a notch, go down a notch. In some cameras you can set the ISO to automatic, but so that the ISO does not drop below the set value. Remember that long exposures require camera stabilization. You can shoot handheld at shutter speeds of no more than 1/60 (if your hands are strong - 1/30 / 1/40). This is usually the inverse of the focal length of the lens (or a little longer if you have strong hands). For example, if you are shooting with a 28mm wide-angle lens, the shutter speed should be no longer than 1/25s unless the subject is moving quickly. If the focal length is 80mm, and the shutter speed should be set to about 1/80s.
6. Underexposure.
Sometimes you may not have enough sensitivity and aperture to get the correct exposure. Instead of lengthening your shutter speed and guaranteeing a blurry image, keep the shutter speed you want and take an underexposed image. If possible, shoot in RAW. In your image editor, you can adjust the exposure a little.
7. Noise.
If you open the aperture and the shutter speed no longer decreases (Lo flashes in the viewfinder), you will have to increase the ISO. By doubling the sensitivity, you gain an entire exposure stop. As ISO increases, noise also increases. He might become artistic device your photos, but, as a rule, it interferes with the perception of the photos. Modern DSLRs can shoot up to ISO 1600 quite tolerably
Remove noise in post-processing, for example in Lightroom, if there is a lot of noise, you can move the color noise slider beyond the 50 mark, and the light noise slider no further than 30. This must be done very carefully so that the picture does not become plastic. Photoshop has a filter that will help you remove noise. There are also many plugins for Photoshop in which you can get rid of some noise in pictures.
8. White balance.
The easiest way to shoot is to set the BB to automatic or shoot in RAW and correct the BB in post-processing.

"launching" captured by Federico
9. Focus.
Generally, your camera will be reluctant to focus in the dark. You can switch to manual focus mode and take a test shot of an object at the same distance as your main subject. Autofocus may miss in the dark.
10. Post-processing.
So in the editor you will have to adjust the white balance and ISO. This is easiest to do if you shot in RAW.
Everything we have said is just a starting point for experiments. We wish you great photos!!
How to use flash for reporting? Everything you need to know to shoot a beautiful report.
With the construction of the frame, everything is more or less clear - the laws of composition are the same for all genres, and the correct exposure can be set simply experimentally.
But with the flash, everything is somewhat more complicated - novice photographers do not understand what settings to set on the flash and in what mode to shoot.
This is exactly what we will talk about today - about working with flash in reportage photography.
Many novice photographers do not use flash at all for reporting. Simply because they don't understand how to work with it. It's much easier to use only natural light.
I’ll say right away: a flash on a report is a necessary thing. Just like without a camera and optics, without a flash, a reportage photographer simply will not be able to take high-quality photographs.
In the post “How to Choose a Flash” we already wrote about the basics of choosing a flash, and in my last article “Equipment for a Reportage Photographer” I talked about flash accessories. If you are interested in learning about soft boxes, reflectors, boosters and strobe frames, this is the place for you.
Today we will talk specifically about the practical use of flash in reporting.
On set

So, you have arrived at the event, there is still half an hour before the event, there is time to “shoot”.
First, let's look at the flash operating modes.
Reporting usually uses two modes:
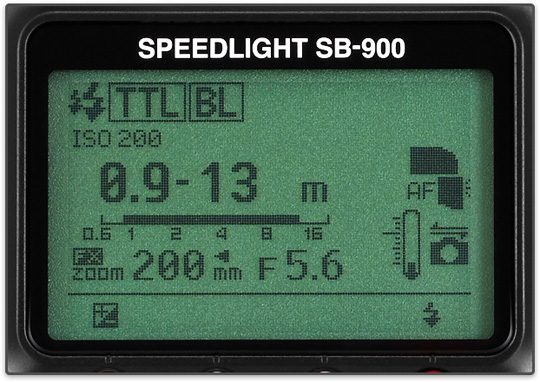
TTL
Nikon's TTL system is called i-TTL, Canon's is e-TTL.
The point is the same - the camera itself sets the flash power based on an analysis of the illumination of the frame. An almost universal mode suitable for most shooting situations.
Its main disadvantage is that if there is a lot of white or black in the frame, the flash may produce too weak or too strong a puff. But this is not due to the operation of the flash, but to the complexity of frame analysis.
This problem is solved by manually adjusting the operation of the TTL flash.
With experience, you will already be able to anticipate situations when you need to manually change the flash power.
Are there 4 men in black tailcoats in the frame?
Feel free to set the flash power a notch or one and a half less.
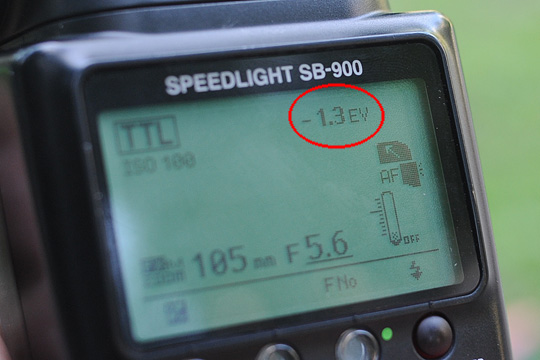
After all, the camera perceives the abundance of black in the frame as the “darkness” of the picture and gives a more powerful puff, completely highlighting the black tailcoats and terribly burning out people’s faces.
Similarly, with a group of girls in white dresses or a person against a white wall in light clothes - the flash in TTL mode will produce a weaker puff than usual, so you can safely turn up half a power level.

Manual mode
Working in manual mode requires some experience in reportage photography and a good sense of the frame.
Among my reporter friends there are photographers who constantly shoot with flash in manual mode, but, in my opinion, it’s worth working with flash only in certain situations.
First of all, manual mode is convenient for shooting in “static” conditions. A typical example is photographing conferences: all subjects are sitting in the same places, practically motionless, lighting conditions do not change, and you can easily set the flash power in manual mode.

Very often, photographers work in manual mode and hold the flash in their hand “out of the way” (more on this below). When the photographer holds the puff in his hand, the conditions are essentially the same, and you can safely work on manual settings.
But I would not advise novice photographers to switch to manual for important shoots. During a reportage, the most important thing is not to miss a good shot, and when working in manual mode, without filming experience, it’s very easy to “screw up” a photo.
We've sorted out the shooting modes, but that's only half the battle. The most important thing when working with flash is to get beautiful lighting in the frame.
Why, when shooting on a point-and-shoot camera, do you get such terribly boring, flat shots?
Everything is very simple - the flash works “head-on”. That is, the light from the flash shines directly on the people in the frame and, as a result, there is no “light pattern” or three-dimensional picture, but only poor flat light.
Therefore, the main rule of flash photography is work with reflected light.
Point the flash at the ceiling or wall and let the light bounce off it and hit the people in the frame.
Volumetric light is the key to a good reportage shot
You will immediately notice how much more interesting the frame becomes with reflected light.
What to do when there is nothing to reflect from?
There are two options:
1) Puff "in the forehead", and then add life to the frame with processing (tools like Shadow/Highlights help especially well). But this is a terrible way out of the situation, since the light will be flat in any case.
2) Shoot on the go. Many photographers use this technique: they put a large soft box or “burdock” on the flash, connect it to the camera with a sync cable and hold it on outstretched arm top-left. Thus, they themselves put the light on the subjects.
This method has one main disadvantage - it only works really well for close-ups; there is little point in lighting a group portrait in this way.
As I already wrote in the article about accessories for flashes, all the “fong cans”, mugs and other reflectors with diffusers can help indoors, but you definitely shouldn’t expect a miracle from them.
We've sorted out indoor shooting: if possible, we use a reflective flash; in bad conditions, we shoot point-blank or take the flash in our hand.
Now let's talk about what to do with puffy on the street.
On the street
Many novice photographers are sure that a flash is not needed on the street at all. This is not entirely true. Or rather, it’s not like that at all. Flash is necessary, you just need to use it wisely.
For the most part, outdoor flash is used in two cases:
1)
To highlight shadows on the faces of people in the frame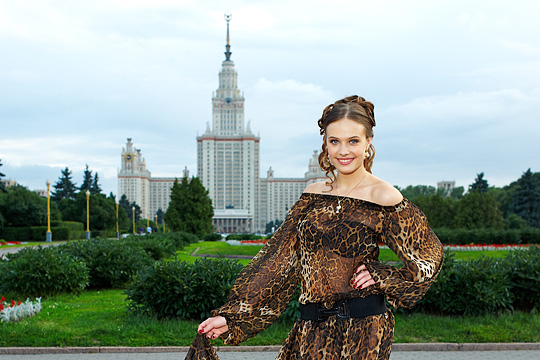
On the street, "burdocks", diffusers and other flash attachments are practically useless. To highlight the shadows, you can safely hit them “on the forehead”.
2) When shooting against the sun
Shooting into the sun is a classic technique for using flash outdoors.
Since today we are talking about working with flash during reporting, we definitely need to talk about two things: radio synchronizers and color filters for flashes.
Radio synchronizers

We have already written in detail about what they are and how they work in our previous articles.
Working with radio synchroizers is a different, higher professional level for a reportage photographer, which requires more shooting experience.
Therefore, first, just get used to working with flash for reportage shooting, and “aim in” to the manual control mode. And only then is it worth thinking about radio synchronizers.
As a rule, during a reportage, radio flash synchronization is used in two cases:
1) When the photographer holds the flash in his hand “on the fly.”

For this kind of shooting, radio sync is essentially just an alternative to a flash-to-camera cable. Synchronization over the radio channel allows you to do without unnecessary wires, which is very convenient.
2) The second use case is placing flashes on the set for better illumination of the frame.
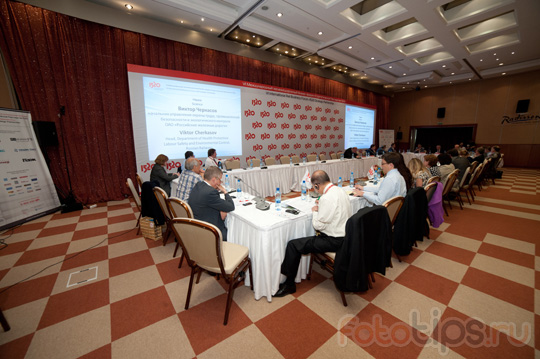
A typical example is filming conferences or seminars.
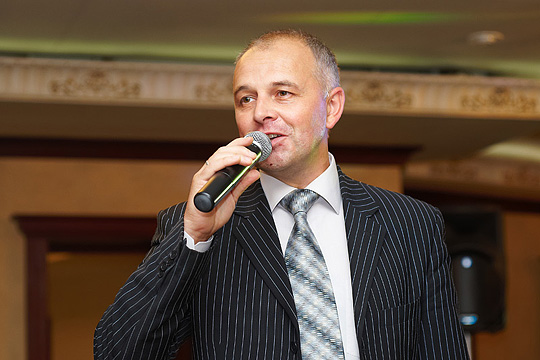
The room is full of spectators and the speaker is behind the podium. It’s good when everything is in order with the lighting on the site - you can take a beautiful general shot of both the speaker and the auditorium.

Great room with good video light
If you are working with a modern platform (for example, Digital October in Moscow), where all the amenities for a photographer’s work have been created, everything is fine, there is nothing to worry about.
But when shooting in an ordinary hotel room, where most corporate conferences take place, the photographer faces one problem. A flash cannot illuminate the entire room evenly, and low lighting does not allow shooting without a flash.
And if you want to take a beautiful photograph of the speaker and the audience, you simply will not be able to achieve uniform illumination of the frame - the light from the flash will not be enough to highlight the speaker.
What do professional photographers do in such cases? They use radio synchronizers!

There was no additional stage lighting in the hall, so a flash with a radio synchronizer had to be installed between the speaker and the auditorium.
The photographer places one speedlight with a radio synchronizer next to the speaker and can easily move around auditorium- the illumination of the speaker in the frame will remain unchanged.
Important point. Try to position the flash higher than the audience in the audience. You can place it on a table, a cabinet, or ideally, bring a flash stand with you.
If the flash is placed on the floor, the speaker and the hall will be lit from below, and this gives “demonic” shadows on the face and looks bad in the frame. Although if you are filming a conference of Satanists, everything is ok.
But it is not always necessary to put a light on the speaker. Very often, additional flashes are needed to simply highlight the room itself where the event is taking place.
At one of the recent shoots, I specially took three very revealing shots for this article. We were filming a conference of a large company, and one of the meetings took place in a large, elongated room.
This is the kind of shot you get if you shoot with one on-camera flash.
It's terribly sad. The corners of the room fall into darkness - an on-camera flash cannot illuminate the entire room.

It's gotten better, but now the right corner is noticeably in shadow.
By adding a third flash, we got the desired picture.
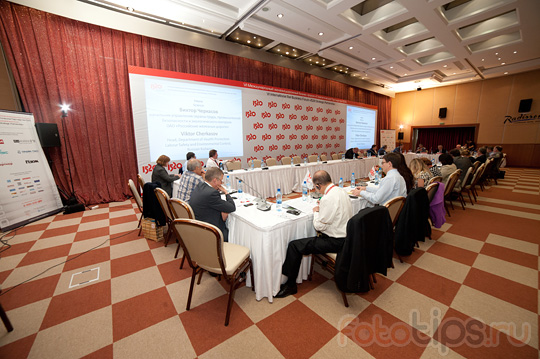
Of course, in the shots for the client, stands and flashes are not visible - only a well-lit room.
A small retreat. Many organizers often do not understand why a professional photographer is worth his money and why he gets it in the first place. It is for such working moments.
A reporting professional is ready for any difficult situation and knows how to get good shots even in poor shooting conditions. He has everything necessary equipment for working in difficult filming conditions and most importantly, he knows how to use it.
The client does not know about this (he does not need to know about it), he simply always receives high-quality and beautiful pictures. This is the professionalism of a photographer.
But let's return to our topic.
Another option for using radio synchronization for reporting is to organize a mobile studio.
Let's say you're filming a small party in a restaurant. Find a corner with a beautiful interior, put the flash on a stand and set up a beautiful key light.

Let the flash with the synchronizer remain on the stand - after all, most of the time you will be shooting classic reportage shots.
But if guests want to take beautiful staged photographs, you will have all the conditions ready for this.
Of course, you can set the flash on the stand to light trap mode, but then it will fire every time one of the guests takes pictures with their camera. Working with radio synchronizers, you have complete control over the filming process.
Color filters
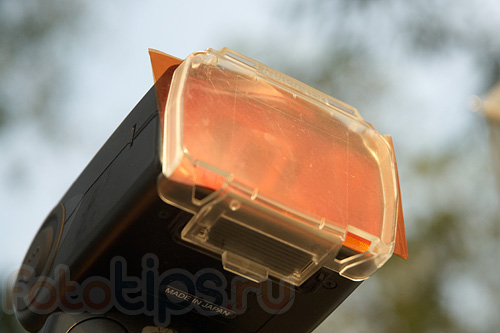
Color filters for flash, or as they are also called, color gels, are an indispensable thing for reportage photography.
Essentially these are simple color films. You can buy specialized sets of ready-made flash gels, or you can simply buy several different sheets of color film and cut them into rectangles. The effect will be the same, but 5 times cheaper.
Typically, gels are used in two cases:
1) To bring the color temperature of the light from the flash closer to the conditions of the room where the shooting takes place.
How does this work in practice?
Very simple. Let's say you're filming in a room where all the walls are yellow-orange and the room is lit with yellowish lamps.

If you shoot without color filters using flash, the entire foreground of the frame will be illuminated with cooler light (from the flash), and the entire background will be yellow-orange.
The fact is that since the light from the flash is cooler than the color temperature in the room, you will have to choose which light to set the white balance: either according to the cold light from the flash (then the backdrop will be excessively “warm”) or according to the main lighting in the room (then people in the foreground will be bluish-cold).
By putting a color filter on the flash, we roughly equalize the light from the puff with the lighting in the hall. The only thing that remains for us to do is to manually select a suitable white balance, as a rule this is a figure around 3000 Kelvin.
2) The second case when gels are used is to create color contrast between the foreground and background.
Let’s say you’re shooting in a boring (in terms of lighting) room, and you want to somehow “liven up” the picture. Very effective technique- make the foreground warm and the background cold.
This technique should not be confused with the first point - there we are struggling with the problems of lighting a room that looks bad in the frame. When creating a “cold/warm” contrast, we do it consciously and only in those conditions that allow it.
Typical example:
We filmed for Mercedes in one of their showrooms. Nice, spacious room, but boring in terms of lighting.
This is what we got by simply putting an orange color filter on the flash:

This is a test shot with me in the foreground and the car dealership in the background. How did you get this picture?
To begin with, we set the color temperature on the camera to around 2500-3000 K. Thus, daylight became bluish-cold.
But then the foreground should have turned blue. This is exactly why we used the gel on the flash - the flash shone an orange light on the people in the frame, but thanks to the cold BB we get natural colors in the frame.
How does this apply to reporting?
For example, you are filming during the day in a room with large windows. Great - put the gel on the flash, set the “cold” BB and go ahead - the client will definitely be pleased with the “unusual” shots.
Gels are also often used to illuminate a model with colored lighting, but this is a separate conversation and not about reporting.
Another trick to using flash gels is to add bright, colorful colors to dull room lighting.
Six months ago, Anton Marakhovsky and I filmed a corporate event in a completely dull (in terms of lighting) room.
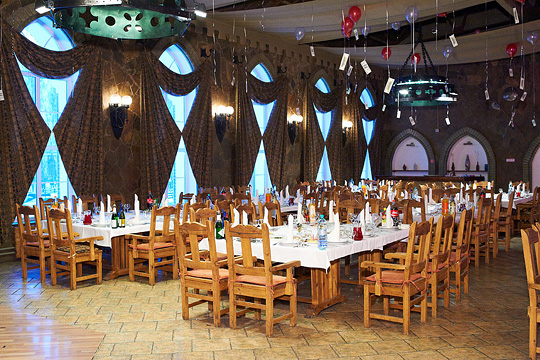
To somehow enliven the picture, we placed one flash with a purple filter in the restaurant interior, and the second (with orange helium) on a music speaker near the stage.


And this is only part of the techniques for working with flash for reporting, the basics that you need to know to work at events.
Another big and very interesting topic- artistic photography with flash. But this is a story for a completely separate article.
A photographer with any level of training can take bright, clear photographs in good natural light, even if he shoots with a regular point-and-shoot camera. The situation is completely different when shooting in low or low light conditions. If necessary once again talk about the role light plays in photography. Some novice photography enthusiasts sincerely believe that the key to high-quality, sharp photos in low light is the use of an advanced, more expensive camera.
However, as practice shows, neither a high resolution The camera's matrices, neither the built-in image stabilizer, nor the multiple zoom help in any way when it is necessary to obtain high-quality, clear photographs in low light conditions. The same goes for using flash, which often does not bring the desired result. Today we will talk about how to improve the quality of your photos when shooting in low light conditions without flash.
Castle Catalan music, FR 52 mm, F3.5, ISO 800, 1/20 s
Why do low-light photos turn out bad?
Before we talk in detail about what ways to improve the quality of photographic images exist when shooting in low light conditions, we need to say the most important thing - why in such situations the photographs turn out to be of such poor quality and bad? Indeed, often when shooting outdoors at night or under the light of a dim light bulb indoors, the photos look blurry and not clear. The thing is that light plays a decisive and most important role in photography. If not enough light reaches the photosensitive matrix of your camera, then most likely you will receive pictures of unsatisfactory, poor quality.
What to do in such a situation? The solution suggests itself - use a flash. Almost all modern digital cameras are equipped with a built-in flash, which, it would seem, is precisely intended for such situations. But in fact, using flash often leads to unwanted and unpleasant effects. After all, a flash in a dimly lit scene is like an explosion of light, which leads to the fact that the objects you want to photograph will be lit in the frame too brightly, harshly, and therefore will look unnatural.
The built-in flash simply “destroys” the whole idea of the photo with hard and deep shadows or, conversely, highlighted areas. The foreground may appear quite flat in the photograph, while the background may not be sufficiently detailed. At the same time, photographs taken in low light without using a flash look much more natural and beautiful. Of course, such a result can only be achieved with the right approach to the shooting process and the photographer having the appropriate skills.
 Palace of Catalan Music - stage, FR 52 mm, F4.5, ISO 800, 1/15 c
 In some cases, using a flash is not advisable at all, since the flash can ruin the natural lighting of the scene or scare the subject in the frame. Flash photography is prohibited in many museums and galleries, and exhibition halls The lighting situation is far from ideal. And when photographing evening landscapes, a flash can generally do a disservice to the photographer. In this regard, you have to think about how to improve the quality of photographs without using a flash, that is, by other means. And here there is only one option - to catch as many light streams as possible into the optical circuit of the camera. The more light there is on the surface of the photosensitive sensor, the greater the likelihood of obtaining a high-quality, bright frame.
Improving photo quality when shooting without flash
Modern digital photography offers us several ways to ensure that the camera matrix captures as much light as possible:
— Sensitivity settingsISO
Perhaps the simplest and most logical way is to raise the ISO sensitivity in the settings digital camera. This parameter determines how much light will reach the sensitive sensor. The ISO value can be pushed to the maximum, but the problem is that high sensitivity, although it allows you to capture more luminous flux, but at the same time increases the likelihood of noise appearing in the photograph. In this regard, it is recommended not to turn up the ISO too much, but to raise the sensitivity value to the optimal level for your camera. This could be ISO 400 or ISO 800 in low light, for example.
You may have some noise in your photos, but this can be easily removed using post-processing software. Raising ISO is the optimal solution when photographing in dark indoor spaces or in a concert hall. It will also be advisable to adjust the sensitivity settings when shooting moving objects in low light conditions.
 Trevi Fountain, FR 27 mm, F5.6, ISO 100, 2 s
 — Optics and diaphragm
If you often shoot in low light conditions, then it is worth investing in a good fast lens. Optics with an aperture of f/1.4 - 1.8 will allow you to take better photographs in low light. Opening the aperture is one way to solve the problem of lack of light in the frame. It is advisable, if photographic equipment allows it, to open the aperture to the maximum. This will allow more light to reach the camera's sensitive sensor, resulting in better, brighter images.
The wider you open the aperture, the lower the shutter speed required to properly expose the frame. It's best to go into aperture priority mode so you can manually set the appropriate values. For example, f/2.8 or f/1.4. Be careful when opening your aperture as wide as possible, as this increases the risk that bright objects in the frame will be too blurred, and the background and faint objects will remain poorly defined. So here, as in the case of photosensitivity, you also need to find the most correct value.
— Long shutter speeds and a tripod
Another way to shoot in low light conditions is to use long shutter speeds. True, this option is only advisable when shooting stationary objects or landscapes in the twilight. The optimal shutter speed is determined by the lighting conditions of the scene and usually ranges from 1/60 to 10 seconds. When selecting shutter speed, you should focus on medium-lit objects in the frame. When using slow shutter speeds, keep your ISO settings low to reduce noise.
Long exposures will, of course, require you to use a tripod. This is necessary to avoid blurring of the frame due to the slightest camera movements. It is also recommended to get a cable release or use a shutter timer to prevent any camera movement. If you don’t have a tripod at hand, you can simply place the camera on a curb, railing or ground, tightly grasping the camera body with both hands. The main thing is to ensure that the camera remains as still as possible while exposing the frame.
By choosing one of the above methods. You can ensure that enough light reaches the sensor to produce an acceptable photo. There are a few more worth mentioning practical advice regarding how to shoot in low light without flash.
 Universita’ degli Studi di Roma La Sapienza, FR 27 mm, F3.5, ISO 100, 4 c
 First, try not to use digital or optical zoom. It reduces the amount of light entering the matrix, which negatively affects the quality of the photographic image. This is especially true for digital zoom. If there is a need to get closer to the subject, it is better to get closer to it than to use the zoom.
Secondly, even if your camera has a so-called “night mode” for shooting, it is better to abandon it and use semi-automatic or manual mode. This will allow you to gain greater creative freedom, achieve best results when shooting in low light conditions and at the same time thoroughly understanding the capabilities of your camera. If you set the manual settings correctly in accordance with the lighting characteristics, you can get really high-quality and unusual results. Try manually setting the shutter speed and aperture, use spot metering, adjust the ISO and white balance settings. Also, in low light conditions, it is advisable to shoot in RAW format to preserve maximum detail. Thanks to this, you will have more opportunities to correct minor defects in the photo image and correct the results in the graphics editor.
Third, if you're shooting in low light, be sure to take a few test shots first with different settings and modes to get a better idea of how to achieve a better photo. You can also take a photo with the built-in flash to compare it with photos taken by changing manual settings (increasing ISO, opening the aperture, or slow shutter speeds). You can compare individual frames directly on the LCD display using the zoom function. Sometimes a photo taken using the built-in flash may be of better quality. For example, in cases where the background does not play a special role for you, it is only important that the subject is well lit.
So, in order to get better images in low light without using a flash, you will have to make sure that as much light as possible hits the camera's sensor. To do this, you can increase the sensitivity of the sensor, open the aperture as wide as possible, or use longer shutter speeds by mounting the camera on a tripod or reliable support. You will certainly improve the quality of your photos in low light, and some minor image defects can always be removed using specialized software.
I am glad to welcome you again, dear reader. I’m in touch with you, Timur Mustaev. One of the previous articles briefly mentioned the topic of indoor photography. Surely the question remains: How to take photographs indoors without flash if the lighting is not enough? This is the question I will try to answer today.
In this article we will talk about the fact that there are times when using a flash is not possible. Believe me, such cases happen quite often. You will learn from the article why in some cases it is better not to use it. Of course, there are also cases when indoor flash photography is simply irreplaceable. I wrote about this in one of my articles.
So, first you need to understand the dangers of low light.
It doesn't take a professional to understand that low light is very rarely combined with high-quality photographs. This is due to the fact that frames in such conditions are too noisy, details are blurred, and some are not drawn. How to fix this?
Any inexperienced photographer will immediately turn on the built-in flash. The solution is logical, because what else could such a bright LED be intended for? But I don't recommend using it indoors. Why? Let's figure it out.
- Firstly, the light itself. The flash creates hard rays, which, moreover, suddenly and sharply burst out of the lamp. They can scare the subject being photographed, cause discomfort in it (if it is alive, of course) or create additional glare on its surface. The polarizer will not be able to help here, because the rays will be directed perpendicular to the lenses.
- Secondly, the flash creates harsh shadows and highlights. It’s good if the flash is external, because if you point it at the ceiling, the result can be very good, but if you use the built-in flash, then we are guaranteed a negative result. You can, of course, simply cover the built-in diode with thin white paper, but then there will not be enough light. In a frame without using paper, the foreground will be overexposed and the background will be darkened, which can create the effect of an unnatural frame.
- Thirdly, the flash creates glare on transparent surfaces. For example, if you want to take a photo Museum exhibit, decoration or, in the end, candy on a display, then the flash should be abandoned. Instead of the object, you will only see a large bright spot. It is this feature of transparent materials that forces museum management to prohibit flash photography.
A reasonable question arises: “How, after all, can we take photographs indoors if we are deprived of flash?” The answer is very simple: open the camera settings and work with shooting modes. We’ll find out which ones now.
"Salvation" of a dark frame
Modern cameras allow us to seriously change their characteristics using the settings menu. As a rule, it is this feature of cameras that allows you to get rid of the shortcomings of the camera or the object being photographed. To shoot indoors with poor light levels, we only need three: , and . There are, accordingly, the same number of ways of working, so everyone can choose something for themselves.
ISO adjustment
The first, easiest way is to change the photosensitivity value. To change it, simply change the parameter in the settings menu. It is he who determines the amount of light that must fall on the matrix to obtain a frame. Do I need any additional equipment for this? Of course not.

To improve camera performance in low light, simply increase the ISO number. But it should be remembered that there is no need to increase this parameter as much as possible. This can cause significant noise and distortion in the final photo. Instead, it is enough to increase the values to 400-800; in rare cases, photographers allow 1600. At this ISO there will not be too much noise and they can be removed during post-processing.
What is this method most convenient for? For filming indoor events, concert halls, and it doesn’t matter what kind of hall it will be: sports or concert. Most often it is used to photograph moving objects, which determines such a range of activities.
The advantage of this method is that there are no additional costs for its implementation.
Photosensitivity photography is popularly used for indoor sports events. Since using an external flash is not possible, and the shutter speed must be at least 1/1000 sec to freeze moving objects.
Diaphragm
This method is comparable in simplicity to the first, but it has its own peculiarity. To implement it, you need to have a special “fast” lens. Its essence lies in the value of the aperture, that is, the curtain that regulates the amount of light passing through the lens. The wider it is open, the more light penetrates and, accordingly, vice versa. So, the smaller the aperture coefficient f, the better, because it has inverse relationship. The smaller the f number, the larger the hole.

So, the ideal value for us would be f 1.8 or f 2.8. They will allow you to get the highest quality results with less shutter speed. But here you should remember that before shooting you need to turn on the aperture priority mode (on the mode wheel it is usually indicated by the letter A if the camera is Nikon and Av if it’s a Canon), and open it to maximum. But there is a nuance here: sufficiently illuminated objects in the frame may turn out to be overexposed or blurred, which is why the subject itself and the background will not be drawn.
This method is also convenient for professionals or wealthy amateurs. It allows you to achieve better results than the first, but requires certain financial costs. In addition, “fast” lenses, as a rule, are expensive and not everyone can afford them. What events can be filmed this way? Corporate parties, graduations, sporting events. But it should be remembered that as the aperture increases, the focal length usually decreases, which is why this method is not suitable for shooting a concert.
Excerpt
This magical setting requires neither increasing your ISO nor purchasing an additional lens. It is enough to choose the correct shutter speed and get a good shot. The end result here is roughly comparable to fast lenses, but it has a number of limitations.
The main thing is to have a tripod. If the exposure time is set long, then without using a solid base, the frame will turn out blurry. You should also keep your ISO low to minimize noise.
So, what is this method suitable for? It is ideal for shooting static scenes, be it landscapes or dimly lit objects. It’s definitely not worth shooting dynamic objects this way, as they simply won’t be reflected properly in the frame. The downside here is sensitivity to movement: the slightest vibration of the camera or object can cause negative consequences.

Conclusion
Under what circumstances is it better not to use flash:
- in the museum;
- shooting sporting events, concerts, newborns and infants;
- in zoos where animals are kept indoors;
- in places where there are reflective objects: glass, mirrors, etc.
- other similar places.
Finally, let's summarize how to shoot without flash and what we should do for this. First we install one of creative modes, this can be either aperture priority (for example, museums, zoos) or shutter priority (if the scene is dynamic, for example, concerts).
Let's say we're filming in museums. We set the aperture priority mode, increase the ISO, not much, to a maximum of 800. Do not increase it immediately, but start from 200. Set the minimum aperture, for example, f 3.5, and the camera will set the shutter speed automatically. If you see that the shutter speed is less than 1/60, then increase the ISO from 200 to 400 and so on.
Important! If, when shooting handheld, the shutter speed is less than 1/60 of a second, there is a high probability that the photos will turn out blurry!
Are you interested in learning more about your camera and learning how to take beautiful photos, but don't know how? Then you have found what you were looking for, this is one of the best assistants for a beginning photographer, the course " Digital SLR for a beginner 2.0". Don't put off learning until tomorrow, start right now and you will see the result!
This, in general, can be completed. I did everything described here personally and was almost always satisfied with the result. Most likely, you will be happy with it too. If you also think so, then tell your friends about this article, and in order not to miss the next article, subscribe to my blog. If you have any questions, be sure to write in the comments or in the feedback form in the contacts section. See you later!
All the best to you, Timur Mustaev.
To obtain bright and rich photographs of decent technical quality in good lighting, photographers most often do not require any special photographic equipment for their work. You don’t even have to shoot with a professional camera; you can get by with an amateur compact; the camera built into your phone is also suitable for certain purposes. But what if you need to take photographs in insufficient or very low light? Most often, under such conditions, the quality of photographs suffers significantly. Why does this happen?
Light is the fundamental element in photography, so when not enough light reaches the photosensitive element of the camera matrix, the image is Low quality, blurry and with unclear boundaries. The natural solution in this situation would be to use an on-camera flash. You just need to keep in mind that you need to use it wisely, since in low-light conditions, the flash creates a powerful, intense stream of light that can illuminate the subjects too much, make them overly bright, create hard shadows and make the background unnaturally dark. Such lighting will destroy any idea of the photo, making it unsuitable for display, or for any other use except throwing it in the trash bin.
A good solution when shooting in poor lighting is to use an off-camera flash. Now they are produced by different manufacturers, for all systems and are intended for different levels photographer training. allows you to control the light, direct the flow in the desired direction, for example, to the side or to the ceiling, thus creating a soft diffuse lighting, which smoothly envelops the subject and allows you to get a photo of high technical quality.
When you can't use the flash
Using a flash undoubtedly improves the quality of photographs under certain conditions, but there are situations when using a flash is prohibited. For example, many art galleries and museums do not allow flash photography; this accessory must be used carefully at children's parties and events. At some sporting events you can’t even make noise, let alone use a flash. For example, when there is a game of chess, billiards, or even a poker tournament, photographers should not use a flash so as not to disturb the players or distract attention with unexpected bright light.

During a poker tournament, players are extremely focused on the process and any external noise, even from a flash, can affect the outcome of the meeting. The organizers of such competitions ask that photographs be taken in silent mode and that no additional lighting be used in order to provide the players with the most comfortable conditions.
When photographing evening landscapes, flash is practically useless, except when you intend to shoot shadows or backlight. In many conditions, photographers must be able to adjust their photography equipment to produce high-quality photographs without additional lighting.
Novice photographers, as a rule, are not always familiar with the secrets of skill that allow you to shoot indoors or outdoors. poor lighting on the street, using available tools and the technical capabilities of the camera. On specialized forums, professionals and experienced users, as a rule, share many tips; it is also worth working on photo tutorials on those photo resources that specialize on this issue. But let's look at some of the nuances of low-light photography and learn a few tricks that will help in difficult situations.
How to Improve Photo Quality in Low Light
The easiest way to get required quantity light on the photosensitive element - increasing the value. Different cameras have different limit values, of course, the photographer can only go by what is available to his camera. It should be remembered that as ISO values increase, color noise appears in the image, which is quite difficult to get rid of when post-processing the image. The larger the image size, the more visible digital noise will be due to large values ISO. That's why one of the most common rules of photography is to use the lowest possible ISO settings when shooting.

In dark rooms with dim lighting, such as concert hall, casino, bar or nightclub will certainly have to use almost maximum ISO values, which may affect the final result. Using this will help you avoid this fast lenses, the aperture value of which can be f/1.2-1.8. The wider the aperture can be opened, the lower the shutter speed is needed to properly expose the frame.
A properly selected exposure pair allows you to take photographs excellent quality, with a well-designed background, clear subjects, optimal depth of field.
What other ways are there to improve photography?
To photograph in low light, you can use it when it becomes possible to keep the aperture open long enough so that enough light reaches the photosensitive element for correct exposure. It is important to understand that this method is mainly suitable for static photography - landscapes, urban architecture, etc. Optimal values are considered to be shutter speeds ranging from 1/60 of a second.
For long exposures, a monopod will come in handy. With its help, natural camera shake is prevented, there will be no blurring of the image, and you can select the best exposure values for processing the entire image.
When shooting from a tripod in low light and using long exposures, it is worth using another simple but important accessory - a cable release or shutter timer. You'll be able to avoid virtually any camera shake, resulting in improved technical quality of your photos. It happens that a tripod is not at hand, then the camera is installed on any stable surface; a remote shutter release will help in such a difficult situation to cope with the task.
What not to do when photographing in dimly lit places
In poor lighting, do not use zoom. If necessary, move closer to the subject. In difficult lighting conditions, manual adjustment will often help you get the correct exposure. For example, in some camera models in automatic modes there is a so-called night photography mode. It should be used with caution, since the camera does not have eyes; it will simply calculate the lightest area that is in the viewfinder and make an exposure based on it. This means you'll end up with gaps in the shadows and an image that's too light and bright in the foreground.
And of course, finally, I would like to advise you to take several test shots before starting the main shooting. By experimenting with different settings, the photographer decides which correction should be used in a given situation. To understand this, thoroughly study the capabilities of your camera, listen to the advice of experienced photographers and take as many photographs as possible! Only such a combined approach will quickly lead you to visible results and high-quality photographs.
