Welcome to the blog! Today is the first practical 3D drawing lesson based on the book “Drawing in 3D from A to Z.” Let's get started!
Introduction to Drawing Letters in 3D Style
Drawing the letters of the alphabet in 3D style is very fun. You can write your name on a lunch bag, or a friend's name on his talk, or even create the title page of a book with great stories that you later publish. Let's learn how to draw the alphabet in five different 3D styles. Remember all the most important things in the description only for the first few lessons. Pay special attention to each fundamental word that was described above and practice every day. I also recommend adding a few to each of these first lessons. If you haven't read the about and sections yet, do so now. You can put it next to your album. Now get ready to relax and imagine yourself as the “lord of paper.” Let the power of the pencil flow onto the paper, yuh!
At trainings, sessions, presentations, and even in personal messages, I am regularly asked how I manage to draw letters so beautifully. I usually laugh it off with stories about convenient markers, but, of course, it’s not all about them. Now I will tell you what you need to do to draw beautiful letters with ANY markers.

- Beginners (myself included) often make the mistake of trying to write quickly on a flipchart. And they end up with scribbles or hard-to-read words. The hand will never be able to keep up with the voice. That's why give yourself as much time as you need in order to draw beautiful letters. When someone draws, it fascinates the audience. The main thing is to comment on your actions and do not stand with your back to the audience. I recommend turning half sideways.
- Don't limit your capabilities by drawing only with your hand; add other muscles as well. Drawing is a good physical activity. Of course, it is not comparable to jogging or swimming, but this is also a workout. Include your arms, shoulders, back and even legs in the process. The more muscles are involved in the process, the faster the skill will be formed, and then it’s a stone’s throw to increasing speed!
- Start by sketching Your any fonts. This, for example, could be Helvetica or Times New Roman. Write one word and circle it several times. Write another word, take a yellow, blue or light green marker or pencil and add a shadow. Make the third word more prominent. Draw first on A4 sheets or in a notebook, then move on to a flipchart or magnetic board. Experiment!
- If something doesn't work out for you, stop. Remember about the three-try rule. Rest, switch to something else. Everything can't work out. Choose a different font or way of drawing letters, try different lines. Knowing your capabilities and limitations is a step towards success.
- Start with sheets of paper in the box. This will allow you to make letters and words even and control the vertical and horizontal. When you feel more confident, you can switch to clean white sheets. Although personally, I still prefer checkered notepads and flipchart sheets.
Enjoy the results!
Learn more in our FREE video training - available to registered users of the site.


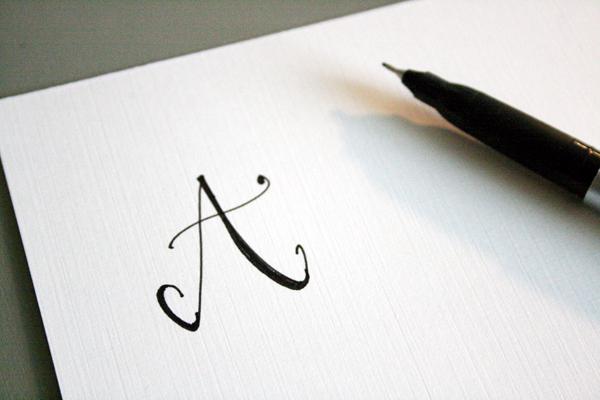
The letter A can be drawn with a pencil step by step in different versions, it all depends on your imagination, and it also depends on why we need to write this letter. At the end, you can erase everything unnecessary with an eraser and outline it with a felt-tip pen. The stencil can be reused many times.
How to draw the letter “C” beautifully

How to draw the name Katya?

Petya's card was prepared and submitted to kindergarten! We spent two days in the clinic, 3 and 2 hours each, there were no queues. 2 doctors delighted me with their pedagogical improvisation. While taking blood, the nurse saw that Petya’s hands were drawn with a felt-tip pen. Do you like to draw?
Masterclasses / Masterclasses from 10 years and above / Graffiti
The most popular styles in graffiti
Graffiti is graphically created plot or letter compositions on a wall or any other street surface, created using aerosol paint. Such drawings can be seen in the subway, on buildings, in passages.
Graffiti is considered a trend of youth subculture, but its history is deeply rooted in our history. Its ancestors are considered to be rock inscriptions and images of animals.
The boom of modern graffiti arose in the 60s of the twentieth century in the United States with the advent of the youth movement “Hip-Hop,” which included both music, dancing, and graphic works on walls. The new culture was supposed to distract black youth from crime and hooliganism in the neighborhoods.
Thus, this culture served as a reason for popularizing the movement not only among blacks, but also among other segments of the country’s population.
The fonts used in graffiti are varied and numerous, so the main task is to come up with your own style based on the standard fonts available. Let's take, for example, standard printed Russian letters (Fig. 1).

They are simple, they have straight lines and sharp corners. To make the font more interesting, you can convert it to another one.
Let's start first with compositional construction so that the letters look correct and competent. To do this, we take sheet A 4, measure 4 cm from the top and bottom and draw straight lines. We will build a new font in this rectangle.
The next step is to make the letters wider and round off the sharp corners (Fig. 2).

Then, we take a bright blue felt-tip pen, cover the letters with color, and then outline them with contrasting blue so that our letters stand out (Fig. 3).

Using the same scheme, you can stylize the letters in the following way - make the lines wavy or “quivering”, and in some places create a “jagged effect”, as on the letter “A” (Fig. 4).

Also, the graffiti font can be thin (Fig. 5). This time let's take the English word “ZOO”, draw thin letters, and make a slight overlap of one letter over another.

Next, let's look at one of the most popular fonts, which has pointed and curved letter elements. They were made with felt-tip pens and watercolor pencils (Fig. 6). Let's take the English alphabet as an example.

In order to understand how to construct these letters (Fig. 7), take a sheet of A 4 format and draw the following grid: step back 2-3 cm from the top, then 4 cm and 1 cm, and then 4 cm again. Thus so that we get 5 long rectangles, with 1 cm between each.

The next step is to draw each letter of this style with a simple pencil (Fig.
How to draw beautiful letters

And only then we paint them with the color we like.
Having sorted out the alphabet, now let's try to draw, in fact, graffiti. Let's take the English word “SKY” (sky) and first make a pencil sketch (Fig. 9).

Then, on the sketch, we make the letters three-dimensional (Fig. 10).

To complete the work, cover the letters with a blue marker, make the volume blue, and the stars gray (Fig. 11).

Our drawing is ready!
You can draw letters in an original way using special computer programs. Buy a notebook that first-graders usually use - with slanted lines for teaching spelling. Ask someone with good handwriting to draw the letters on each page, or print samples on paper. After all, in case of failure, the drawing can be easily erased or corrected.
The trend towards using typewritten text is increasing every year: less and less people take up pen and paper, but more and more often they turn to the keyboard. Sometimes typing text on a computer is easier, faster and more beautiful than writing by hand. However, having good handwriting is important at all times, and you can be able to draw letters beautifully after much practice. It’s never too late to learn how to draw capital letters beautifully, but in order to develop calligraphic handwriting in the future, it is recommended to start training writing skills already in preschool age. Therefore, in order to prevent periodic reproaches regarding the incomprehensible configuration of symbols on paper, you should learn to write them clearly and, as elegantly as possible.
In an effort to draw letters beautifully, some people even take courses in perfect writing, but mastering this skill is much easier than it seems at first glance. In particular, you can create stencils from cardboard or PVC if you plan to apply a lot of large letters to any surfaces. To do this, just redraw the images of the letters onto the material used and cut out their outline. To draw letters beautifully, all you have to do is apply the stencil to the surface and paint over it.
The letter A can be drawn with a pencil step by step in different versions, it all depends on your imagination, and it also depends on why we need to write this letter. At the end, you can erase everything unnecessary with an eraser and outline it with a felt-tip pen.
How to draw a beautiful letter a
The stencil can be reused many times.
How to draw letters beautifully
Like any child, Evusha loves to draw. She draws every day (I'm not talking about our organized drawing classes). He simply takes a piece of paper, or more often several at once, a pencil or pen and draws.
We begin to draw the letter with a pencil. Now let's draw a red strawberry on the glass?
How to write a beautiful name in pencil? And decorate it colorfully with bright colors. You can write beautiful numbers in different ways.
For parents who do not know how to draw and sketch at all, you can print the copied letter on a colored sheet of paper. Then place the plastic on the printed sheet. If you decide to transfer to cardboard, then you will have to use carbon paper.
How to beautifully draw the letter I (with a pencil step by step)?
The letter A is easy and simple to draw.
How to draw the name Nastya? We will draw it using the Karmen font. Perhaps it is simpler than the previous one.
The letter I can be depicted in a simple way that anyone can do if you print out a template and simply draw the letter along the contours. In this case, it is necessary to strictly follow all the lines and bends, and only then transfer the imaginary letters onto the paper. According to experts, this type of activity can make handwriting more clear and even. The trick is to copy the outlines of the text/letters and presto, depth!
Next we draw exactly the same line, but a little shorter. You can download coloring pages with letters from the Internet and invite your child to color them. On the top one we draw letters and partially make slits with scissors or a stationery knife. On the bottom layer of paper you can make a drawing corresponding to a given letter or number. You can glue the applique. This could be a “fringe” of colored paper, “sprinkling” of confetti, scrapbooking paper, newsprint tubes, voluminous curls, fans or snowflakes.
1. Coloring. You can download coloring pages with letters from the Internet and invite your child to color them.
How to draw the name Katya?
How to draw a name? - I found such a strange request on the Internet. In other words, they are looking for unusual fonts with all sorts of curls and other features. In the lesson “How to write a name beautifully” we will analyze several cute fonts and learn how to write the names Katya, Nastya, Dasha, Vika and Natasha beautifully.
How to draw a name? - I found such a strange request on the Internet. As it turns out, many people are interested in how to write a person’s name beautifully. This is my personal experience, but to create and implement it, I studied the methods of specialists.
Petya's card was prepared and submitted to kindergarten! We spent two days in the clinic, 3 and 2 hours each, there were no queues. 2 doctors delighted me with their pedagogical improvisation.
While taking blood, the nurse saw that Petya’s hands were drawn with a felt-tip pen. Do you like to draw?
Order
How to order three-dimensional letters (signs with three-dimensional letters)?
Order process signs with three-dimensional letters consists of several stages:
1. Volumetric letters | design layout of the sign:
Typically, for exterior and interior signs, corporate writing is used - the logo and trademark of the company, in this case everything is quite simple - the work of the designer remains on the layout. If there is no corporate spelling, you need to create it or use ready-made fonts that are available in any graphics and text editor.
In any case, volumetric letters (elements) must have some shape and size, and at this stage you solve this problem yourself or with the help of our designers.
Briefly about the design layout:

2. Volumetric illuminated and non-illuminated letters | choice of technology:
As the name already implies, volumetric letters can be illuminated or non-illuminated. Most often, signs have a front glow, i.e. Only the front part of the sign elements lights up. This is the simplest technology; the only simpler ones are volumetric elements with external lighting. Also, three-dimensional letters can have a side glow and/or a backlit glow (in this option, the light is also directed back to the facade, creating a luminous “halo” around the letters, while the letters should be mounted at a distance of several centimeters from the facade). Gas-light tubes or LED modules are used as light elements, and gas-light tubes can be located not only inside the letter, but also fill the front surface of the letters (this technology is called “open neon”).
Letter bodies, depending on the size and illumination option, are made of aluminum, plastic or plexiglass. If plastic or plexiglass is used to make the body of volumetric letters, then it is covered with self-adhesive film, but if the letters are aluminum, then they can be painted in any desired color.
At this stage, our technical specialists, based on the finished design layout and your wishes, will propose optimal technologies for manufacturing volumetric letters and make a cost calculation.
Briefly about the choice of volumetric letter technology:

3. Installation and connection:
When ordering a sign, you must provide an electrical outlet for its connection. You will receive recommendations from our technical specialists about the location of the electrical outlet and the required cable as soon as the two previous steps are completed.
It is necessary to take into account that work on providing electrical output for the sign is carried out by full-time electricians servicing the facility where the sign is located. The second component of the installation of illuminated letters, namely the installation diagram and work plan, is worked out together with the technical services of the facility: a sign mounting scheme is developed, the need for metal frames is determined, the location of transformers for neon or power supplies for LED modules is determined. The time of work (day or night), the need for special equipment (cranes, aerial platforms), their location during installation and other necessary data are also determined.
Briefly about the installation and connection of volumetric letters:
It is necessary to provide (make) an electrical outlet at the time of installation!!! We will advise you on the location and required cable cross-section
Agree on the fastening scheme (together with the technical services of the facility)!!!
How to draw the letter a beautifully pictures
This is done by our technical department with the technical services of the facility
4. Conclusion of the contract and deadlines for completing the work
The timing of the work depends on the volume of work, the complexity of the illuminated three-dimensional letters, and the timing of approval of various technical details of the project. The production and installation itself usually takes from 14 to 20 days for small and medium-sized projects (for example, 15-20 volumetric illuminated letters with installation). For large letters - with complex installation work (roof installations, etc.) the production time is 1.5 - 2 months.
To conclude an agreement, in addition to all the necessary technical details, standard data is required (details, copies of Certificates of registration with the tax office and registration of the enterprise, a copy of the power of attorney for the person signing the agreement, or an appointment order). We will prepare the contract for manufacturing and installation ourselves.
Briefly about the timing of the work and the conclusion of a contract for the production of three-dimensional letters:
Naturally, if the design project is already ready, and all that remains is to manufacture and install (for example, for online retailers), then the production itself takes little time - sometimes a few days, so we are happy to give discounts to prepared clients who do not burden our managers, designers and technical services.
So, let's sum it up:
Signs with three-dimensional letters (how to order)
Briefly about the design layout:
- Select a font for writing (branded or from existing ones in editing programs). !!! We can do this for you :)
- Take a photograph of the object on which the sign will be placed. !!! We can do this for you :)
- Make a computer installation of the sign placement location. !!! We can do this for you :)
- Take measurements from the object. !!! We can do this for you :)
2. Briefly about the choice of volumetric letter technology:
- Select the illumination option (front part, side of letters, backdrop, “open neon”, external illumination with spotlights)!!! We can help you do this :)
- Select a color (front surface of the letter, sidewall, if necessary, neon color)!!! We can help you do this :)
3. Briefly about the installation and connection of three-dimensional letters:
It is necessary to provide (make) an electrical outlet at the time of installation!!! We will advise you on the location and required cable cross-section
Agree on the fastening scheme (together with the technical services of the facility)!!! This is done by our technical department with the technical services of the facility
Agree on the time of work!!! Our specialists do this together with yours.
Provide a place for access and installation of special equipment for installation. !!! You do this upon our request immediately before installation.
4. Briefly about the timing of the work and the conclusion of a contract for the production of three-dimensional letters:
Signboard design project (3-10 days)
Coordination and preparation of the contract (2-5 days)
Manufacturing and installation of a small and medium-sized project (14-20 calendar days)
Beautiful letters
On this page beautiful letters
Cyrillic letters
ℬ Ᏸ β ฿ ß ᗷ ᗽ ᗾ ᗿ Ɓ Ᏸ ᗸ ᗹ ᛔ
Ũ ũ Ū ū Ŭ ŭ Ù ú Ú ù Ҋ ҋ
ᛕ ₭ Ꮶ Ќ k ќ ķ Ķ Ҝ ҝ ᶄ Ҡ ҡ
ጠ ᛖ ℳ ʍ ᶆ Ḿ ḿ ♍ ᗰ ᙢ 爪 ♏ ₥
Փ փ Ⴔ ቁ ቂ ቃ ቄ ቅ ቆ ቇ ቈ ᛄ
Letters
Letters in circles:
ᗫ Ɗ Ď ď Đ đ ð ∂ ₫ ȡ ᚦ ᚧ
ℱ ₣ ƒ ∮ Ḟ ḟ ჶ ᶂ φ ᚨ ᚩ ᚪ ᚫ
₭ Ꮶ Ќ k ќ ķ Ķ Ҝ ҝ ᶄ Ҡ ҡ
ℳ ʍ ᶆ Ḿ ḿ ♍ ᗰ ᙢ 爪 ♏ ₥ ጠ ᛖ
beautifully draw letters on a 4
Beautiful letters
On this page beautiful letters for nicknames. Cyrillic letters of the Russian alphabet and Latin.
Cyrillic letters
Ꭿ ₳ Ǻ ǻ α ά Ǡ ẫ Ắ ắ Ằ ằ ẳ Ẵ ẵ Ä ª ä Å À Á Â å ã â à á Ã ᗩ @ Ⱥ Ǟ
ℬ Ᏸ β ฿ ß ᗷ ᗽ ᗾ ᗿ Ɓ Ᏸ ᗸ ᗹ ᛔ
ℰ ℯ ໂ ६ Ē ℮ ē Ė ė Ę ě Ě ę Έ ê Ê È € É Ế Ề Ể Ễ é è عЄ є έ ε Ҿ ҿ
Ũ ũ Ū ū Ŭ ŭ Ù ú Ú ù Ҋ ҋ
ᛕ ₭ Ꮶ Ќ k ќ ķ Ķ Ҝ ҝ ᶄ Ҡ ҡ
ጠ ᛖ ℳ ʍ ᶆ Ḿ ḿ ♍ ᗰ ᙢ 爪 ♏ ₥
ਮ ዘ ዙ ዚ ዛ ዜ ዝ ዞ ዟ ℍ ℋ ℎ ℌ ℏ ዙ Ꮵ Ĥ Ħ Ή Ḩ Ӈ ӈ
০ ℴ ტ ٥ Ό ó ό σ ǿ Ǿ Θ ò Ó Ò Ô ô Ö ö Õ õ ờ ớ ọ Ọ ợ Ợ ø Ø Ό Ở Ờ Ớ Ổ ổ Ợ Ō ō Ő ő Ӫ ӫ
թ ℙ ℘ ρ Ꭾ Ꮅ 尸 Ҏ ҏ ᶈ ₱ ☧ ᖘ ק ₽ Ƿ Ҏ ҏ
Ⴚ ☾ ℭ ℂ Ç ¢ ç Č ċ Ċ ĉ ς Ĉ ć Ć č Ḉ ḉ ⊂ Ꮸ ₡ ¢
Փ փ Ⴔ ቁ ቂ ቃ ቄ ቅ ቆ ቇ ቈ ᛄ
Letters
Letters in circles:
Ⓐ Ⓑ Ⓒ Ⓓ Ⓔ Ⓕ Ⓖ Ⓗ Ⓘ Ⓙ Ⓚ Ⓛ Ⓜ Ⓝ Ⓞ Ⓟ Ⓠ Ⓡ Ⓢ Ⓣ Ⓤ Ⓥ Ⓦ Ⓧ Ⓨ Ⓩ ⓐ ⓑ ⓒ ⓓ ⓔ ⓕ ⓖ ⓗ ⓘ ⓙ ⓚ ⓛ ⓜ ⓝ ⓞ ⓟ ⓠ ⓡ ⓢ ⓣ ⓤ ⓥ ⓦ ⓧ ⓨ ⓩ
Ꭿ ∀ ₳ Ǻ ǻ α ά Ǡ Ắ ắ Ằ ằ ẳ Ẵ ẵ Ä ª ä Å À Á Â å ã â à á Ã ᗩ @ Ⱥ Ǟ
ℬ Ᏸ β ฿ ß Ђ ᗷ ᗽ ᗾ ᗿ Ɓ ƀ ხ ␢ Ᏸ ᗸ ᗹ ᛔ
☾ ℭ ℂ Ç ¢ ç Č ċ Ċ ĉ ς Ĉ ć Ć č Ḉ ḉ ⊂ Ꮸ ₡ ¢ Ⴚ
ᗫ Ɗ Ď ď Đ đ ð ∂ ₫ ȡ ᚦ ᚧ
ℰ ℯ ໂ ६ £ Ē ℮ ē Ė ė Ę ě Ě ę Έ ê ξ Ê È € É ∑ Ế Ề Ể Ễ é è عЄ є έ ε Ҿ ҿ
ℱ ₣ ƒ ∮ Ḟ ḟ ჶ ᶂ φ ᚨ ᚩ ᚪ ᚫ
Ꮹ Ꮆ ℊ Ǥ ǥ Ĝ ĝ Ğ ğ Ġ ġ Ģ ģ פ ᶃ ₲
ℍ ℋ ℎ ℌ ℏ ዙ Ꮵ Ĥ Ħ ħ Ή 廾 Ћ ђ Ḩ Һ ḩ ♄ ਮ
ℐ ί ι Ï Ί Î ì Ì í Í î ϊ ΐ Ĩ ĩ Ī ī Ĭ ĭ İ į Į Ꭵ
₭ Ꮶ Ќ k ќ ķ Ķ Ҝ ҝ ᶄ Ҡ ҡ
ℒ ℓ Ŀ ŀ Ĺ ĺ Ļ ļ λ ₤ Ł ł ľ Ľ Ḽ ḽ ȴ Ꮭ
ℳ ʍ ᶆ Ḿ ḿ ♍ ᗰ ᙢ 爪 ♏ ₥ ጠ ᛖ
ℕ η ñ ח Ñ ή ŋ Ŋ Ń ń Ņ ņ Ň ň ʼn ȵ ℵ ₦ ห ກ ⋒ Ӈ ӈ
ℴ ტ ٥ Ό ó ό σ ǿ Ǿ Θ ò Ó Ò Ô ô Ö ö Õ õ ờ ớ ọ Ọ ợ Ợ ø Ø Ό Ở Ờ Ớ Ổ ổ Ợ Ō ō Ő ő
ℙ ℘ ρ Ꭾ Ꮅ 尸 Ҏ ҏ ᶈ ₱ ☧ ᖘ ק ₽ թ Ƿ Ҏ ҏ
ℝ ℜ ℛ ℟ ჩ ᖇ ř Ř ŗ Ŗ ŕ Ŕ ᶉ Ꮢ 尺 ᚱ
Ꮥ Ṧ ṧ ȿ § Ś ś š Š ş Ş ŝ Ŝ ₰ ∫ $ ֆ Տ క
₸ † T t τ Ţ ţ Ť ť ŧ Ŧ 干 Ṫ ṫ ナ Ꮏ Ꮖ テ ₮ ⍡
∪ ᙀ Ũ Ủ Ừ Ử Ữ Ự ύ ϋ Ù ú Ú ΰ ù Û û Ü ử ữ ự ü ừ Ũ ũ Ū ū Ŭ ŭ ų Ų ű Ű ů Ů น Ա
₩ ẃ Ẃ ẁ Ẁ ẅ ώ ω ŵ Ŵ Ꮤ Ꮃ ฬ ᗯ ᙡ Ẅ ѡ ಎ ಭ Ꮚ Ꮗ ผ ฝ พ ฟ
Here you can find beautiful, interesting, unusual symbols from different scripts of the world, similar to the letters of the Cyrillic and Latin alphabet. They can be used when it is not possible to change the font, but you really want to diversify the text. For example, when corresponding on social networks, or for nicknames. Here is the symbol. It seems like the Russian letter b, but in fact, it is from the Coptic alphabet. It's called Chima. It was used by the Egyptians 15 centuries ago.
How to draw beautiful letters
Perhaps the coincidence is not accidental - both Coptic and Cyrillic were created on the basis of the Greek alphabet. But in Russian there are more letters. This is because there were more sounds in the language. The missing letters Cyril and Methodius (the creators of the Russian alphabet) were probably just invented. Hence the difficulties in finding analogues for Ya, Yu, Y, Kommersant. If you wish, you can look through the sections yourself, you may find a lot of interesting things.
Additionally, not all Unicode characters are supported by fonts. In the text, these squares are displayed instead.
Many of these beautiful (or just plain weird) letters are modifications of standard types. The various dots and strokes are diacritics. They denote pronunciation features in different languages, such as a long vowel sound or a soft consonant. By typing a letter into the search on the site, you can find out where it came from. For nicknames (and not only) you can (if possible) also use numbers and other symbols for a nickname from Unicode.
It is believed that a person’s handwriting can be influenced by a huge number of factors: patience, perseverance, certain character traits and even the physiological characteristics of the structure of his hand.
When is the best time to learn to write beautifully?
If you want to have clear and legible handwriting, it is, of course, best to start improving it from childhood. Some children are interested in the process of writing even before reaching the right age, so you can safely start teaching your child even before school. It is believed that the optimal age to start learning the basics of calligraphy, that is, how to draw beautiful letters of the alphabet, is 5 or 6 years old.
How to learn calligraphy?
Many people believe that in order for handwritten letters to look beautiful, it is necessary to complete special courses in the art of perfect writing. Unfortunately, not everyone will decide to spend a certain amount of money trying to master this skill. However, there is another method by which you can learn how to beautifully draw the letters of a particular or other alphabet without resorting to any preliminary master class. This method is widely used among calligraphy professionals and amateurs alike.
What is a stencil?
Perhaps many have come across the term “stencil”. This word has Italian roots (“traforetto”) and literally translates as “perforated plate.” Its name almost completely conveys the very essence of this element: it consists of a fairly dense material, such as cardboard, onto which one or another image is first applied and then cut out. This method allows you to obtain multiple repeated images, therefore, there will no longer be a need to work on each of them separately. Naturally, any inscription can become a stencil, which can be transferred to the desired surface many times. Thus, a “perforated plate” is an excellent option for how to beautifully draw letters, which can then be used for completely different purposes (designing cards and invitations, decorating clothes, furniture and household items).
Disadvantages of Illegible Handwriting
Today, the need for handwritten text is increasingly receding into the background due to the modernization of the writing process as such. Preference is given to computer input, keyboards have replaced the ballpoint pens we are used to, and printing any text document is now much easier and faster than reproducing it by hand. But sometimes a situation arises when the need to write even a few sentences yourself cannot be avoided, and it is in this case that the problem of many people comes to light - insufficiently legible handwriting. Learning how to draw beautiful letters while maintaining acquired skills is not easy, but it is quite possible. Therefore, in order to prevent periodic reproaches regarding the incomprehensible configuration of symbols on paper, you should learn to write them clearly and, as elegantly as possible.
How to draw the necessary materials
Not only training will help ensure unique writing of the elements of the alphabet, but also some additional details, all of which can be easily found in any store specializing in these items. These items include the following:
- a sheet of transparent rigid film;
- a set of felt-tip pens;
- awl;
- roller ruler (use it to draw parallel lines);
- paper;
- model knife.
Exercises used to improve handwriting
The claim that writing style cannot be improved is an absolute fallacy. It is quite possible to do this, but then it is recommended to use the following instructions.


Regularly practicing the above lessons is guaranteed to help improve your handwriting, and calligraphy will no longer seem like something completely unattainable.
Important and tasty – juicy, vine! The grapes are just ripening in the fall, and you can safely feast on grapes, remembering that they begin with the letter B!
She rolled herself up with a newspaper - very respectably and wisely, as for a letter of the Russian alphabet, because there are a lot of letters in newspapers, and the letter G is one of them!
disguised as a real tree! And no one would have realized that this was the letter D if my mother had not prompted me - after all, trees come in such intricate shapes!
Letter E and E in pictures We have one - erase the two Christmas tree decorations on top, and you will get a real spruce! So our letters are friendly, and all children need them in the New Year!
– just an iron lady! Our letter is made of iron, beautiful and modern. It would probably sparkle with a metallic sheen in the sun if you took it outside!
- all covered in patches, poor thing! The patch on the letter Z is literally everywhere, a winter letter. But the patch is very useful if there are holes.
Letter I and Y in pictures all covered with needles! The needles on it look very cute, what do you think?
Ours looks like a cactus - very strange, one of its legs is buried in the ground, in a pot. Here's a cactus with a K!
– it’s either Lemon, but most likely the Moon. Because the entire letter L is in craters, which are found on the Moon, although from Earth they can only be seen through a telescope.
– this is a real car! True, cargo.
- threads, real threads in spools! This is what our letter N has become
turned into a real island! An uninhabited island, there is water around it, and perhaps even a lake!
- a spider, and nothing more, with a Web!
– this is a real surface-to-air missile! A rocket soaring up!
consists of snow and footprints!
It has turned into a real, fashionable telephone with a handset!
made from snail! Look what a Clever Snail we have - gracefully crawling along a stick under an Incline!
Made from Fountain – beauty, and that’s all!
Made from Bread - bread is the head of everything, so it came in handy here too.
Letter C in pictures all decorated with Flowers, and in a beautiful pot!